Are you looking for a free Socket.IO server hosting, but not sure where to start? Look no further! In this step-by-step guide, we’ll walk you through the process of hosting a Socket.IO server with port forwarding, all within the comfort of your VS Code environment.
Step 1: Install the Necessary Tools
Before diving into the setup, ensure you have the following tools installed:
- VS Code: Download and install Visual Studio Code if you haven’t already. It’s a lightweight but powerful code editor available for all major platforms.
- Node.js: Install Node.js, which includes npm, the Node.js package manager. You’ll need Node.js to run JavaScript on the server-side.
Step 2: Create Your Socket.IO Server
Open VS Code and create a new directory for your project. Inside this directory, create a new file named server.js (or any name you prefer) to write your Socket.IO server code. Install the Socket.IO library using npm by running the following command in the terminal:
npm install socket.io
Now, write your Socket.IO server code in server.js. Here’s a simple example to get you started:
// server.js
import express from "express";
import http from "http";
import { Server } from "socket.io";

const app = express();
const server = http.createServer(app);
const io = new Server(server, { cors: "*" });

io.on("connection", (socket) => {
  console.log("A user connected");

    // Broadcast the message to all clients
    io.emit("message", message);
  });

  socket.on("disconnect", () => {
    console.log("User disconnected");
  });
});

const PORT = process.env.PORT || 3001;
server.listen(PORT, () => {
  console.log(`Server running on port ${PORT}`);
});
Step 3: Configure Port Forwarding
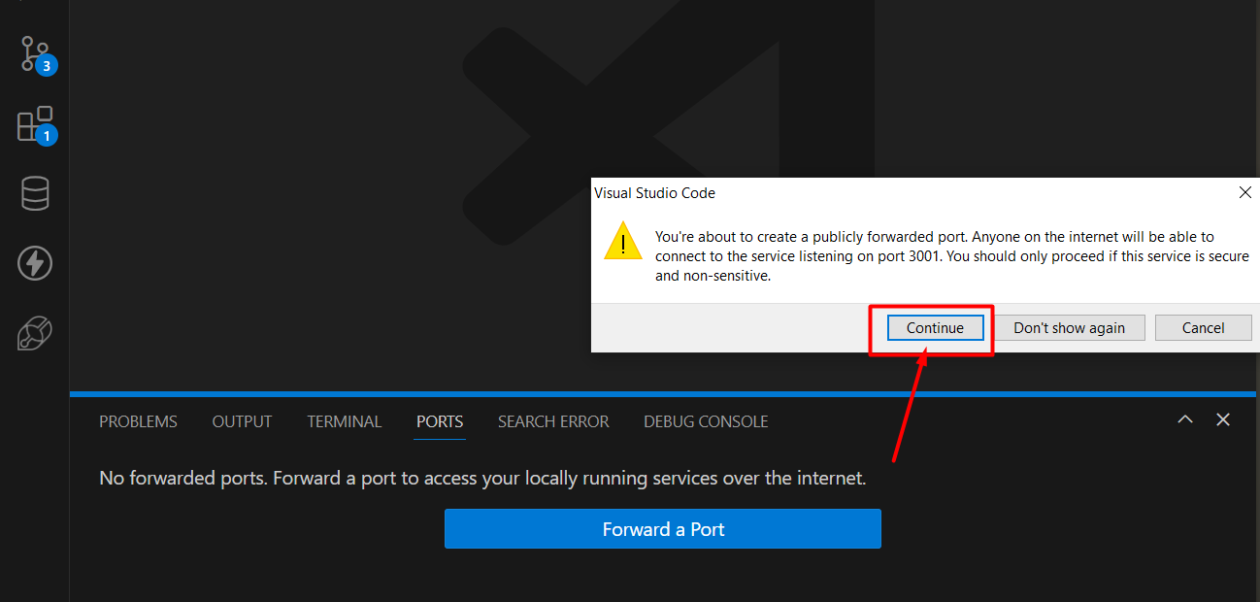
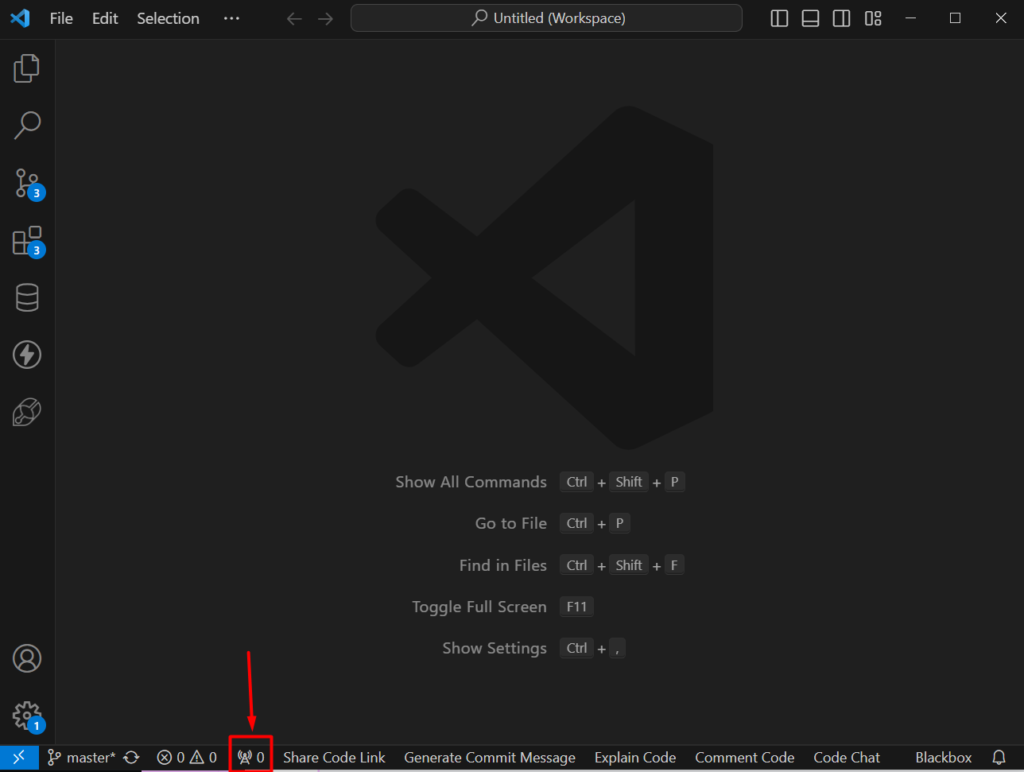
To enable external access to your Socket.IO server using VS Code, you need to configure port forwarding on your VS Code editor. Open VS Code and you can find the port forwarding icon placed in the bottom bar.
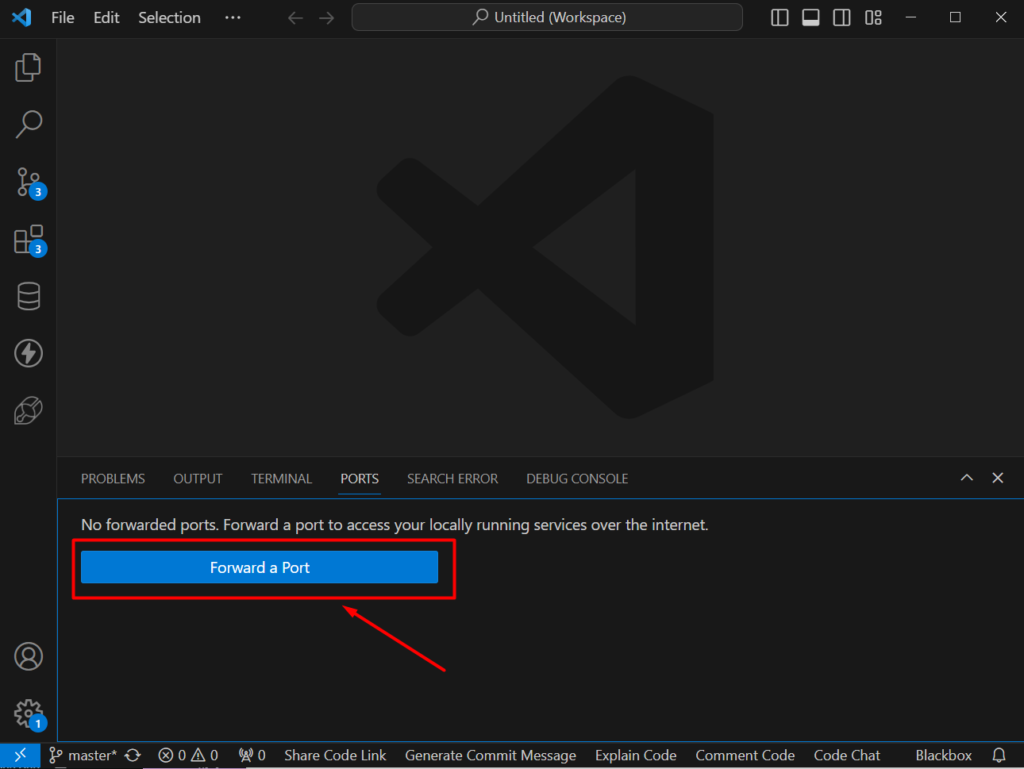
Now in the port forwarding section forward port 3001 (or whichever port your Socket.IO server is running on).
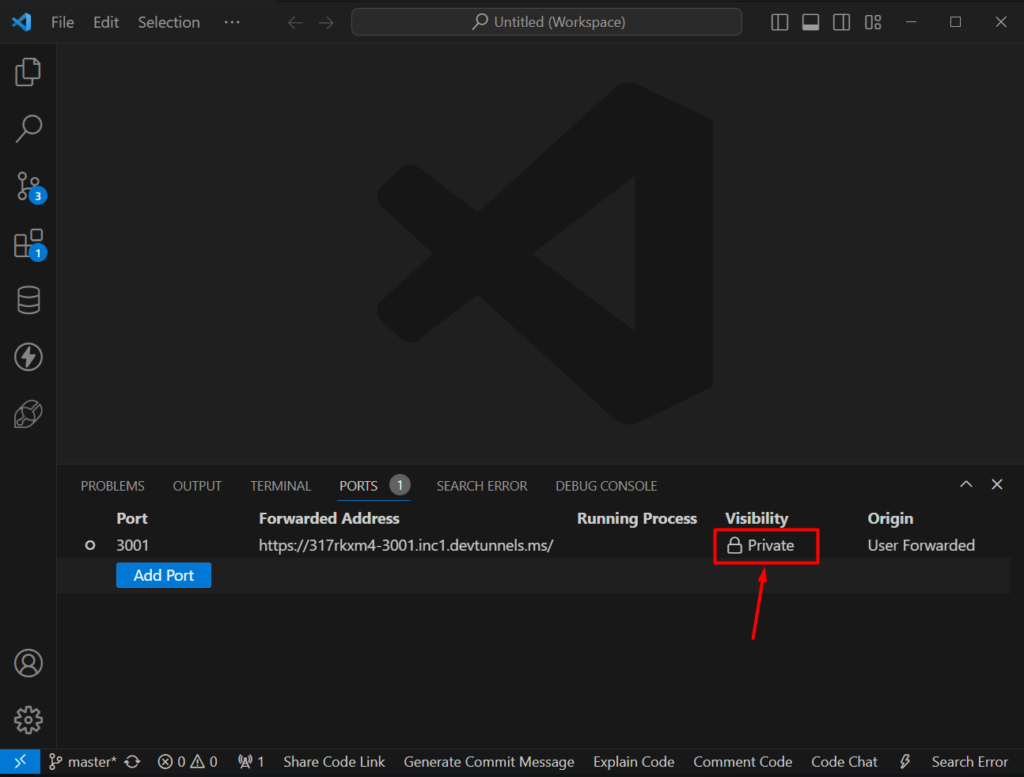
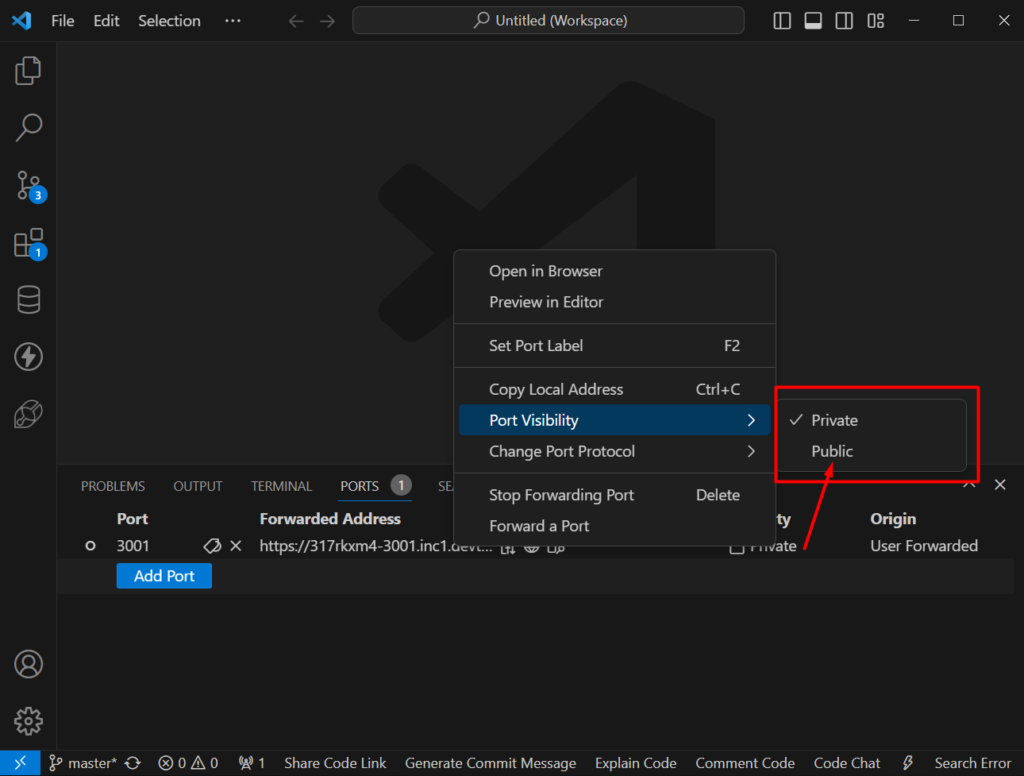
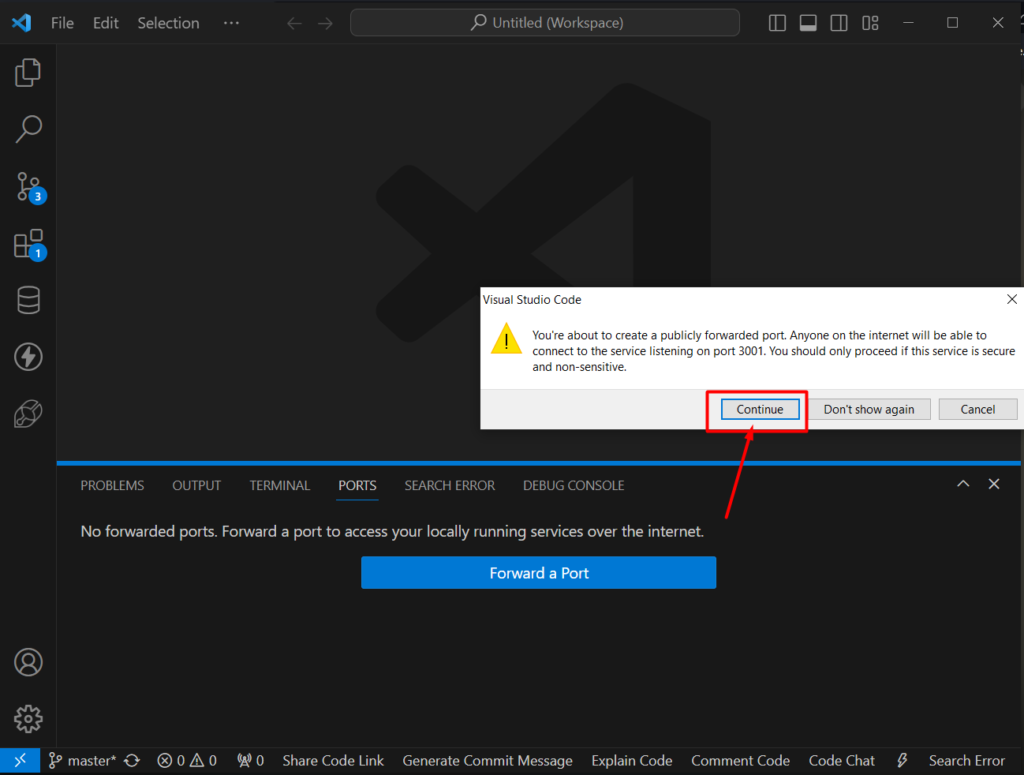
After forwarding the port you have to change the visibility to public. It’s required to access the port from outside.
Right-click on the visibility to change it to public –
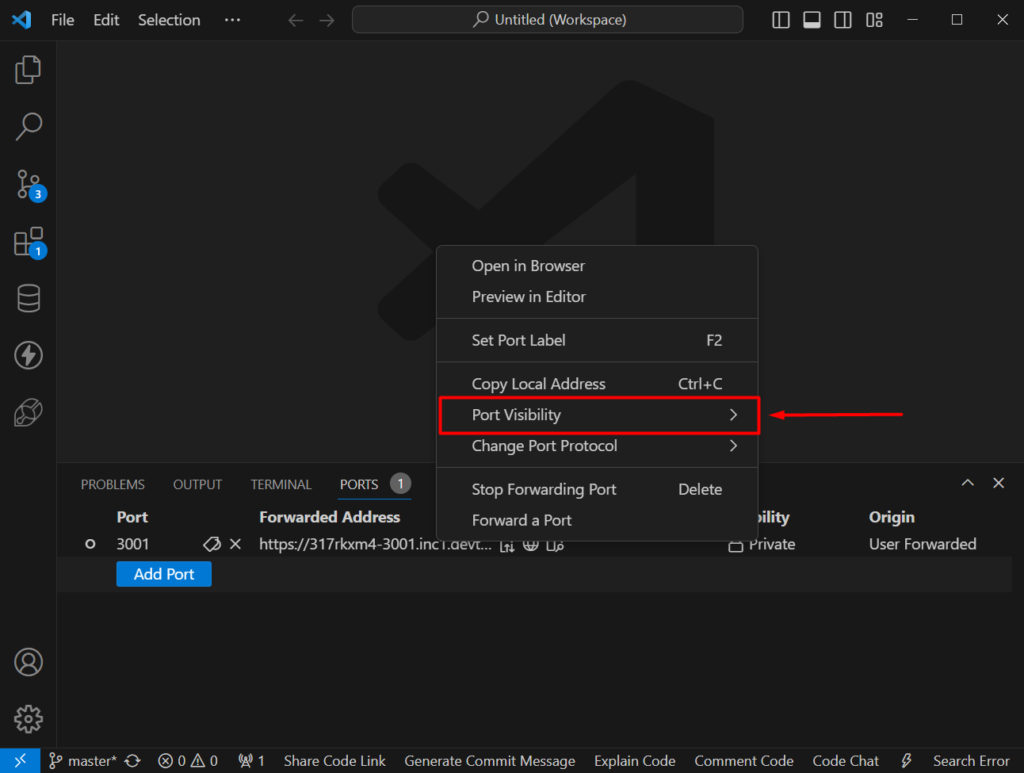
Then hover on the Port Visibility option and select the public
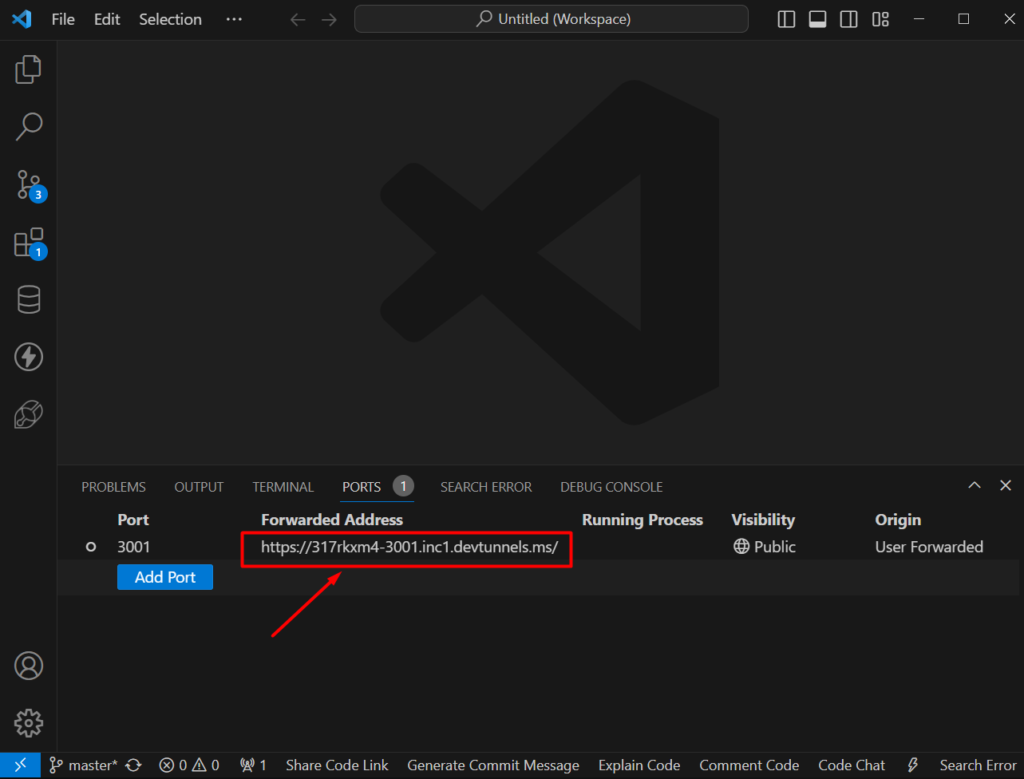
Now copy the Forwarded Address
Step 4: Test Your Connection
Once port forwarding is configured, start your Socket.IO server by running the following command in the terminal:
node server.jsNow, you can test your Socket.IO server by creating a simple HTML file with JavaScript to act as the client. Connect to your server using Socket.IO’s client-side library. Here’s an example HTML file:
<!DOCTYPE html>
<html lang="en">
<head>
  <meta charset="UTF-8">
  <meta name="viewport" content="width=device-width, initial-scale=1.0">
  <title>Socket.IO Client</title>
  <script src="https://cdn.socket.io/4.4.0/socket.io.js"></script>
</head>
<body>
  <script>
    const socket = io('http://your-forwarded-address:3001');
    socket.on('connect', () => {
      console.log('Connected to server');
    });
  </script>
</body>
</html>
Replace ‘http://your-public-ip-address:3001’ with your Forwarded Address and the port you configured for port forwarding.
Discover the convenience of hassle-free Socket.IO server hosting, all at no cost. This solution empowers you to effortlessly set up and maintain your Socket.IO server without incurring any expenses. With our platform, you can facilitate seamless real-time communication between clients and servers, eliminating the need for costly hosting fees.
Bid farewell to the financial burden of traditional hosting services and embrace uninterrupted connectivity with this free Socket.IO server hosting solution. Experience the freedom to create and innovate without constraints.
Setting up your Socket.IO server with port forwarding in VS Code is a simple and straightforward process. Equipped with the right tools and a dash of configuration, you’ll be on your way to unleashing the full potential of real-time applications.
Begin your journey today and embark on a coding adventure where the possibilities are endless. Happy coding!
